How to Blur Background in Adobe Lightroom? 3 Effective strategies
Many times, you have seen an image where the background objects distract from the main subject of the image. In that case, you need to blur the background in Adobe Lightroom. I use this technique to make my photos look professional and attractive. Moreover, the objects in the image are more clearly visible. Adobe Lightroom has a number of blurring tools, including blur lenses, AI masking, and brush tools.
I will share simple steps to blur the background of your photos. Follow the given steps and make your photos more perfect and professionally attractive. I have also discussed various reasons behind this blurred background. Let’s explore some helpful tips for blurry backgrounds in Adobe Lightroom.
When should I blur the background in Adobe Lightroom?
There are certain situations where it is important to blur the background in Adobe Lightroom. One of the main reasons is that backgrounds distract from the main things. Another option is to hide the backgrounds to make the image look more attractive and professional.
How does the background blur in Lightroom CC as opposed to Lightroom Classic?
Lightroom has several versions, such as Lightroom Classic and Lightroom CC. Both are great for blurring backgrounds and have the same method. The only difference is to look for masking sections in both versions of Lightroom MOD APK. On the right toolbar, there is the same icon for Lightroom CC.

Background Blur Techniques in Lightroom
I will show you three different techniques to blur the background in Adobe Lightroom.
1- Blur Background in Lightroom with Lens.
The lens is the latest AI technique for background blur in Adobe Lightroom. It identifies all the features and saves you time in blurring the background. It also has brushes to blur background objects, giving you great control over the tools.
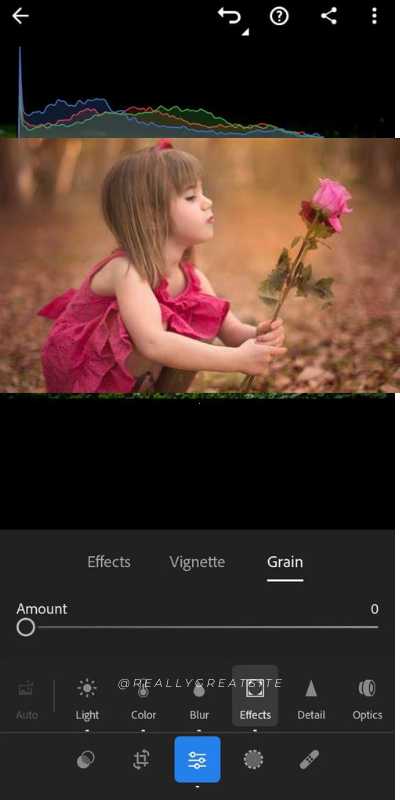
Step 1: Open the image and locate the Lens Blur.
To apply a lens from the Lens panel, open it in Lens Blur and click on the image.
Step 2: Set the amount of blur.
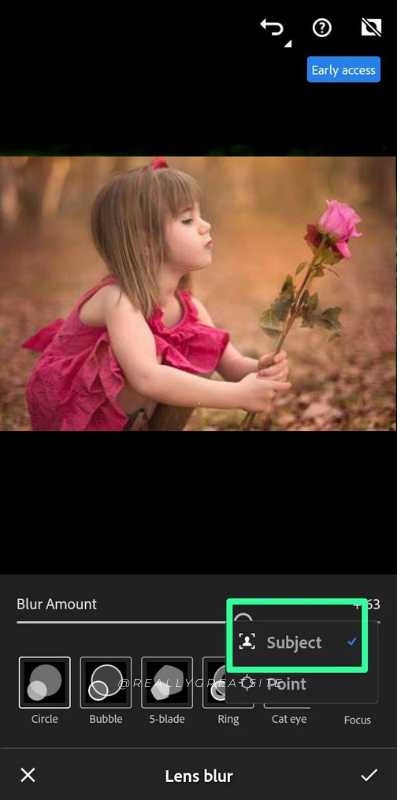
There are two options for setting the blur. The first is the amount of blur and the second is the bokeh style. There are five different Bokeh styles that you can choose from to apply blur.

Step 3: Set the blur distance.
The focal range slider allows you to set the focal length in your image. This AI technique works best.
Step 4: Fine-tune your selections.
Use the brush tool to blend the blurred areas. This instrument can be customized and the coverage amount defined.

2- Blur the background in Lightroom using an AI mask.
As the digital world brings great advancements, Lightroom has some advanced features including AI masking to blur the background in Adobe Lightroom. Let’s see how this technique works.
Step 1: Select the image and mask icon.
Open the image and then proceed to generate the module.

There are many mask icons in the histogram, so you need to click on the mask icon. Use the Lightroom shortcut “Shift + W” to make the process easier.

Step 2: Add subject mask (option 1)
It contains various masking options. If you want to blur everything in the image, you can select “Subject Mask”.
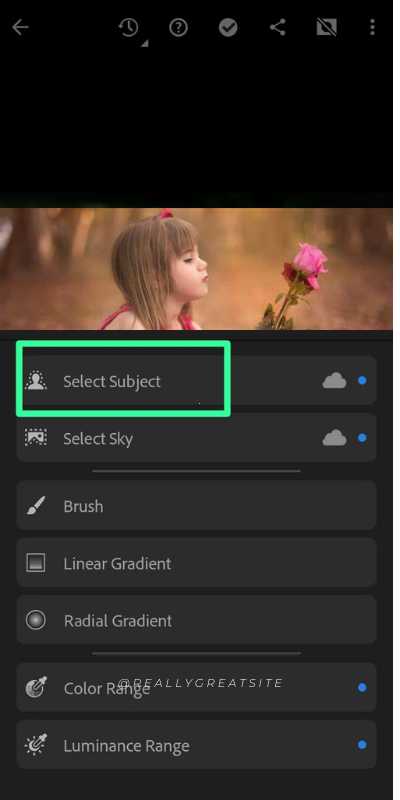
The AI function masks the objects in the image. If you want to mask other objects in addition, you can use other options. You can also use the options to unmask subjects.

Click the “Subtract Box” button to remove the object from the mask. There are also some brush tools that you need to learn.
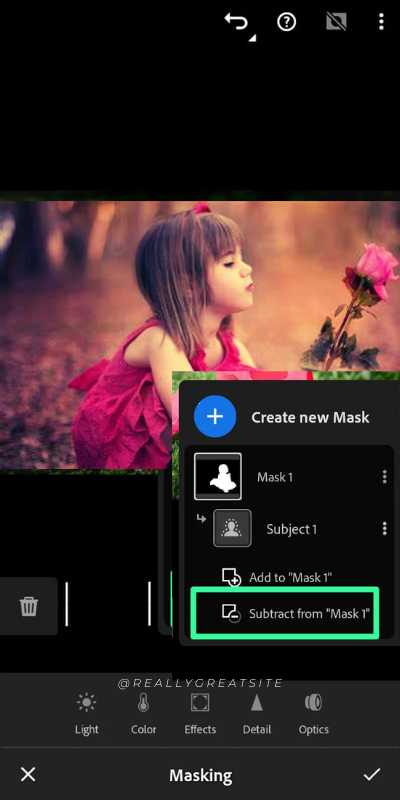
Use the brush tools to blur the desired areas.
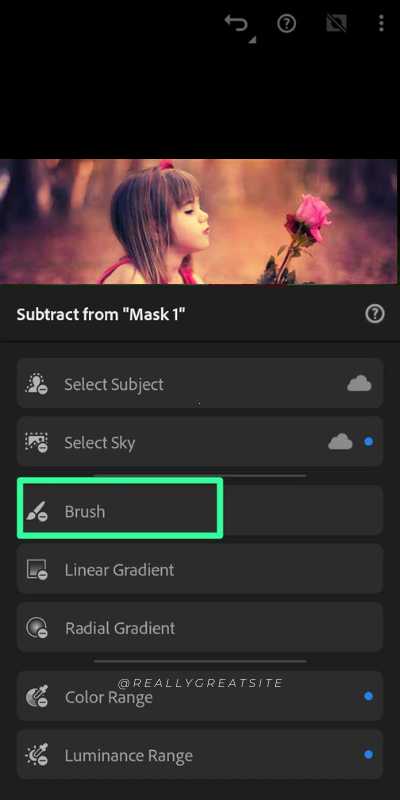
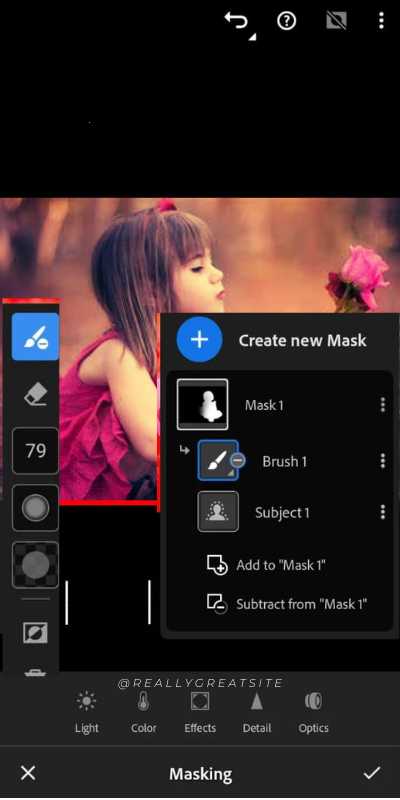
Use these brush tools to blur areas in your image.
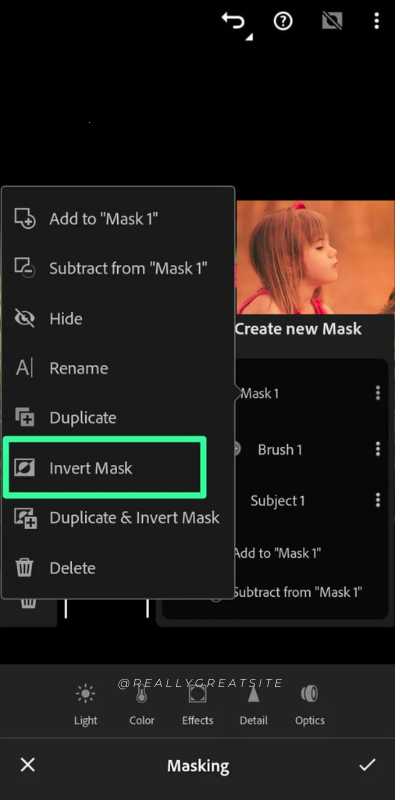
If your subject is completely masked, you can invert Mask 1.
This is what your photo will look like.

Step 2: Add a background mask (option 2)
To speed up the above process, use Lightroom’s advanced background masking feature. Click on it and get the same process in no time.
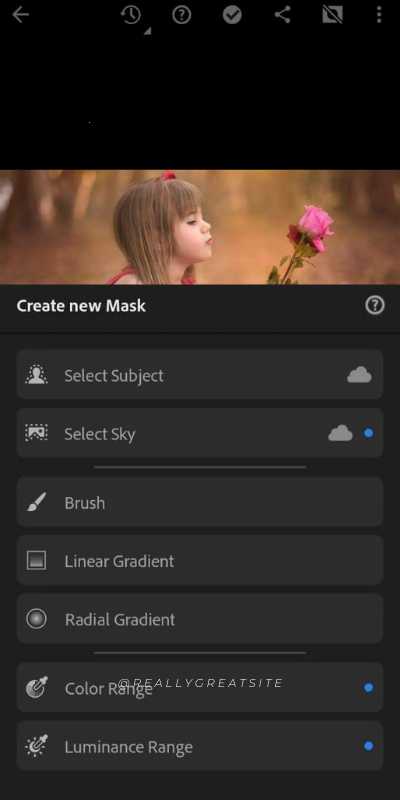
Step 3: Use the Sharpness slider to apply the blur.
This is the final step of applying blur to the background. First, adjust the masking settings in the Adjustments panel.
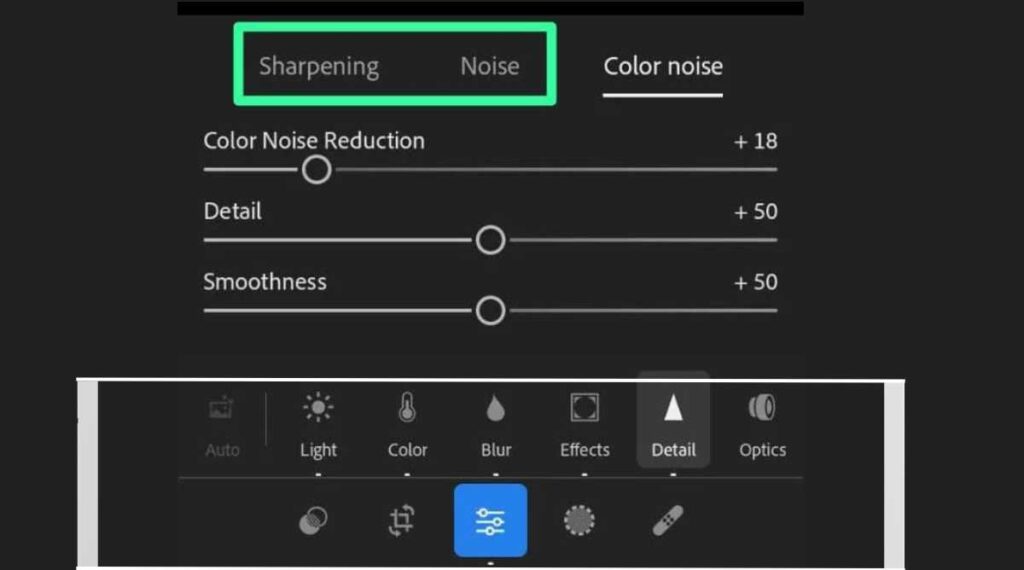
Find the Sharpness slider in the Adjustments panel for the blur effect. You can move the sliders lower and higher to check the difference.
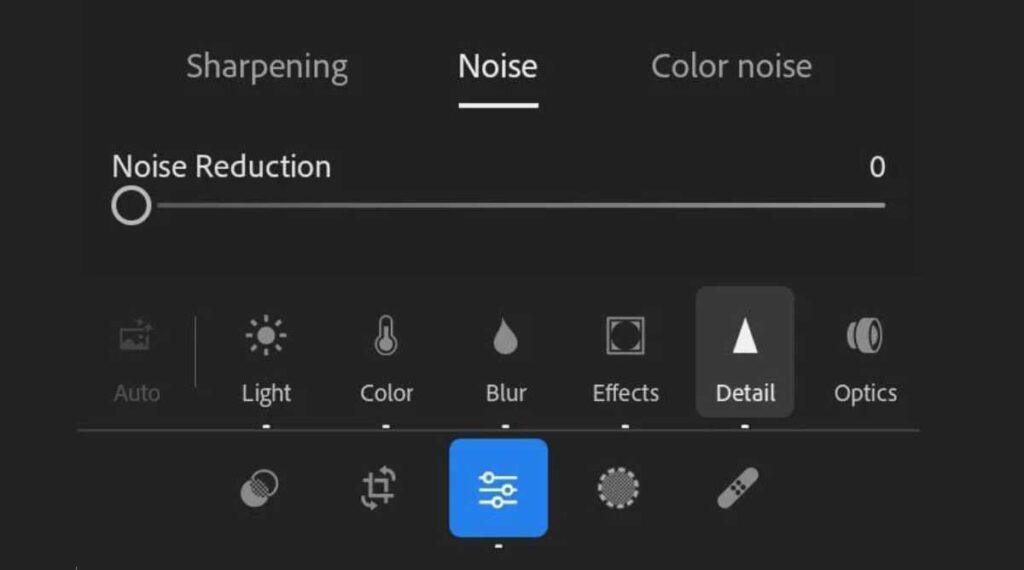
3. Blur the background with the Lightroom Brush.
This is the third useful technique to blur the background in Adobe Lightroom using the brush tool. Brush tools have mask options to create a new mask and an effects section to select a preset.
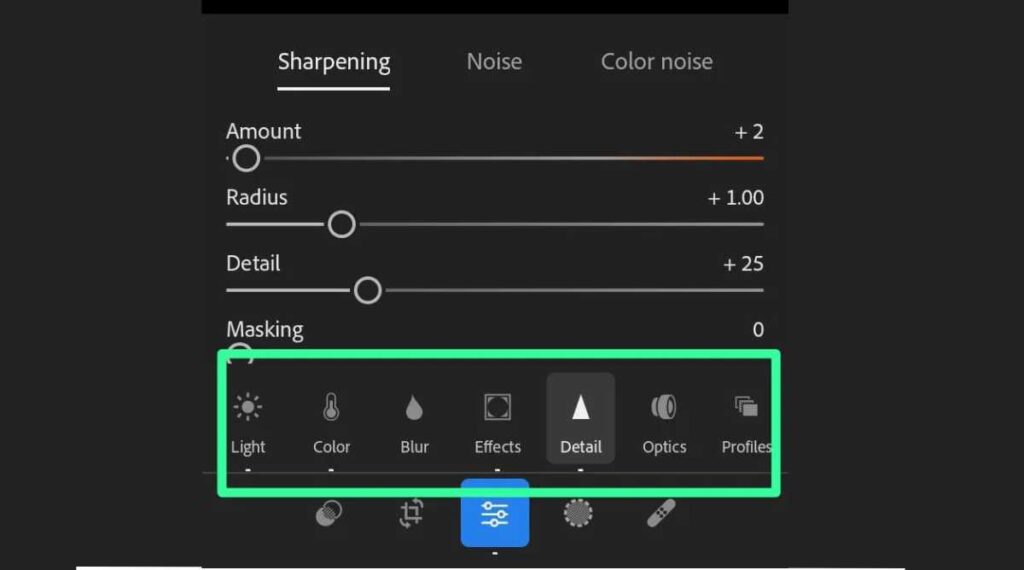
Brush settings include several factors such as:
Size: Set the size.
Density: Set the strength of the brush.
Feather: To make the edges of the brush softer or harder.
Flow: Set a value lower than 100 to strengthen the brush effect.
Auto Mask: Make edges clearer while painting.
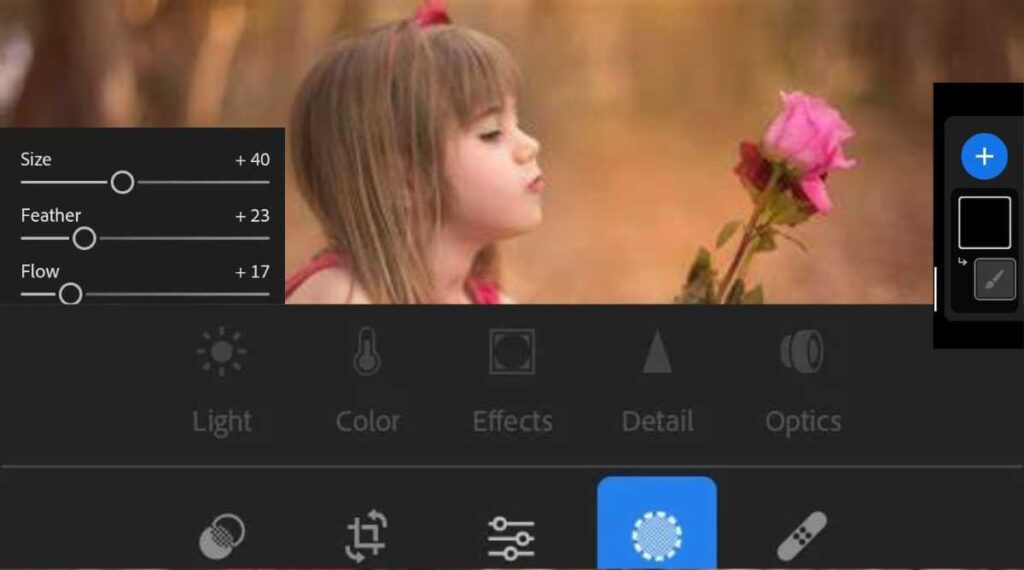
Step 1: Open the brush tool and drop your image.
The brush tool is located in the Develop module of Lightroom. Open your image and select the sharpening adjustment.
Step 2: Paint the background by adjusting the sharpening slider.
Randomly paint the background by setting the sharpening slider to -100. To show or hide the effect mask, use the Lightroom shortcut “O”. It helps to see the effect of painting and brushing on the image. Start working along the edges by adjusting the density, feathering, flow, and size of the brush.
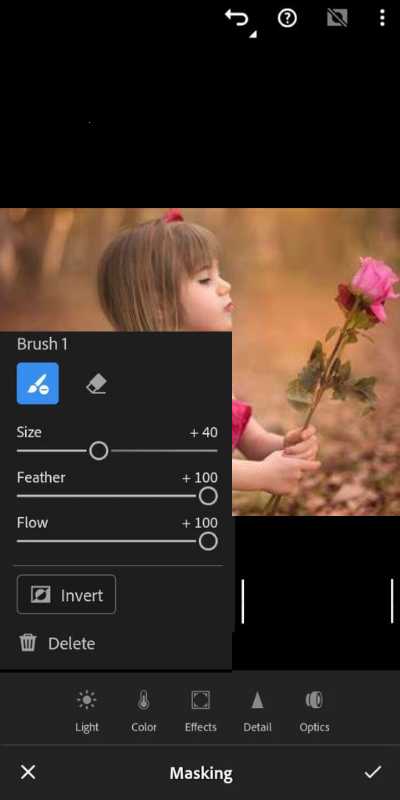
You can also remove the subject using the Wipe Brush option, which applies the blur effect to the background. A thick mask creates a realistic blur, which increases as it moves through the focal plane.
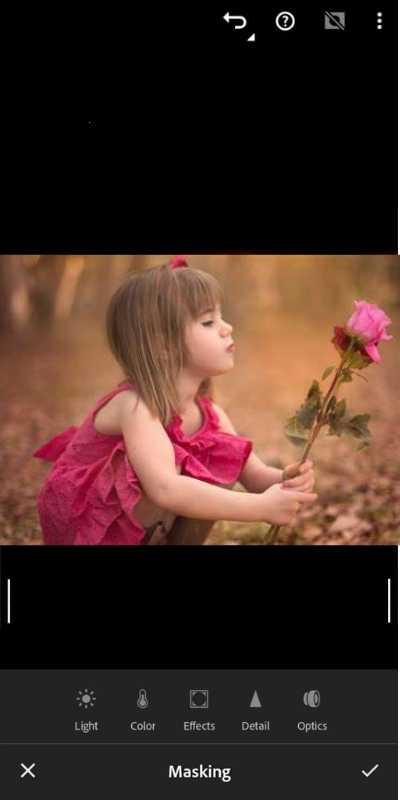
Step 3: Increase the amount of blur.
Lens blur works if you set the sharpness to -100, but it is not as noticeable. You can also duplicate brush adjustments by right-clicking on the brush marker and selecting Duplicate Adjustments. This brush is adjusted like the previous brush and all sliders are set to 0, while the Sharpness slider should be at -100.
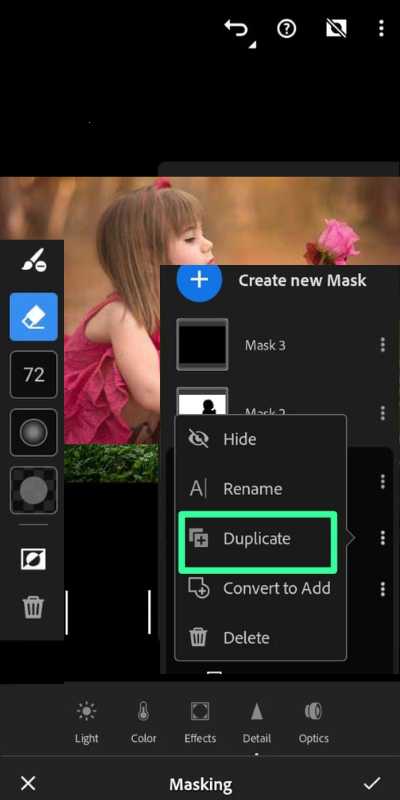
You can duplicate multiple brushes for a blur effect.
Step 4: The Final Touches
This is the last step in making the final adjustments to your image to blur the background in Adobe Lightroom. Set all sliders to 0 and the tone of your image. Once you’re happy, export the image, and you’re done.

Reasons to blur the background in Lightroom
There are several reasons for blurring the background in photos; the main one is to focus on the object in the photo. People blur the background in Adobe Lightroom to remove a dreamy look and unwanted elements in the images. Let’s discuss them in detail.
1- Focus more on the object.
When you are photographing a public place, most of the people are at the center of attention. It distracts from reality. So, to focus more on objects, people look for background blur tools in Adobe Lightroom.
2- Add a dreamy style
Everyone wants to take dreamy photos and blur backgrounds in Adobe Lightroom to give a beautiful look. Moreover, when I do my client work, this is the main reason I blur the background in Adobe Lightroom. I apply the right amount of opacity and make my photos look more professional.
3- Remove unwanted elements.
Sometimes, people blur the background in Adobe Lightroom to make the images clean and flawless by removing unwanted elements. You can use a lower or higher amount of opacity to hide background objects and apply soft blur effects.
Tips for Blurring Background in Adobe Lightroom
With a few tips, you can naturally blur backgrounds in Adobe Lightroom and polish your photos professionally.
i- Choose the right image: To blur the background of an image in Adobe Lightroom, choose a specific image to get a natural-looking effect.
ii- Adjust the feather: The edges of the brush should be soft to create a blur effect, which is only possible by adjusting the feather. Start low and then increase it for a more natural and blurred effect.
iii- Adjust the density: The opacity of the brush plays an important role in the opacity. Adjust the density and keep it low so that the background does not fall over.
iv- Use the Auto Mask feature: This is one of the most advanced tips for blurring the background. Using the auto mask feature that detects the background of the subject and adjusts the brush.
v- Use presets: Create and use presets to simplify the blurring process and save time.
How to blur the background in Lightroom CC Mobile?
Follow these steps to blur the background in Lightroom CC Mobile:
Step 1: Take a photo with the Lightroom camera or import the desired photo.
Step 2: Activate the selective mode from the menu.
Step 3: Click on the Plus icon to open the Tools menu, selected on the left.
Step 4: Select the blur method of your choice (Brush, Radial or Graduated Filter).
Step 5: Create a selective mask by dragging the image.
Step 6: There are different mask options that you can select by tapping on the pin. You can duplicate, invert, or remove a mask.
Step 7: Find the sliders that you can find in the menu.
Step 8: Then blur the background with the sharpening slider.
Step 9: Then save and import your image.
The result
I hope so. It has been an interesting journey for you to learn more precise facts about background blur in Adobe Lightroom. You need to upload an image and apply one of the techniques mentioned above. After editing your image, then follow the Lightroom export settings to export your images.
If you notice that your photo’s skin isn’t smooth, check out my guide on how to smooth the skin in Lightroom. You can make your photos look beautiful, authentic, professional, and natural. consider!

